Learning to isolate your
subject is one of the most important techniques you can learn!
We take pictures so we can show what we see - not what
we necessarily physically see - but what is our "vision". This
isn't as obscure as it sounds! Our cameras can't capture what we see.
It's physically incapable of that. So, we can use it to our
advantage.
When we photograph a scene, we two-dimensionalize it - we flatten it.
Everything is on the same plane. When we actually "see" the scene
with our eyes, we have depth perception. Our brains have the
ability to separate close objects from distant objects and we can easily
concentrate on a close object if that is what we're viewing.
But most cameras cannot record a 3-D
image. So, when we put this 3-D image on a 2-D piece of paper (or monitor), we
have to compensate so that the viewer can easily see the subject and
separate it from the background.
There are several techniques for doing this.
 |
Get close to your subject; |
 |
Control your Depth of Field; |
 |
Use contrast to your advantage; and |
 |
Keep it simple! |
Get close to your subject...
By getting physically close to your subject, you are
isolating it. There can be no question what your subject is.
In this picture, the lily is clearly the subject. There are no
other distractions to draw your viewer's attention from the subject.
You can use a macro lens or a close-up accessory lens on top of your
normal lens to get closer to your subject.
Control your depth of field...
The nice soft background in this image is created by using a
large lens opening and carefully focusing on the subject. The
result is that the subject is sharp, but the background is blurred to
where it doesn't distract from the subject, but instead actually ADDS to
the subject. Had the background forest been sharp, you would have
had difficulty in seeing the chipmunk. The blurred background
allows you to instantly identify the subject.
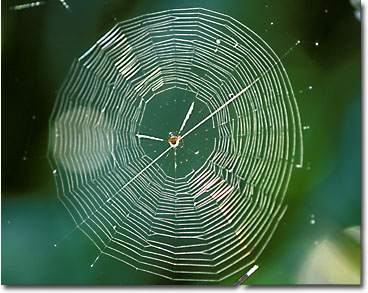
How many times have you walked thru a forest and could barely see a
spider web?? Well, by controlling your depth of field, you can
make it clearly stand out.

Use Contrast to your advantage...
Contrast allows you easily isolate one object from another.
For example, if you have a light colored subject on a dark background or
a dark subject on a light background (silhouette) you are using contrast
to differentiate your subject from the background. One of the
drawbacks of photography is the limited contrast range we can capture. Remember that your eye can see a FAR greater contrast range than
our cameras can. So, if we have a subject that is in sunlight with a
background that is in shade, the sensor will not be able to capture detail
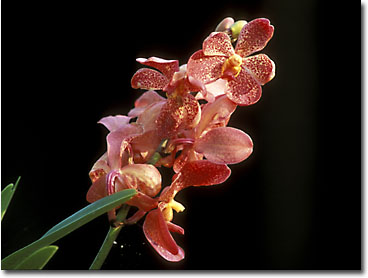
in both areas. If you expose for the lighter foreground, the
background will go "black". In this picture, that's exactly what I
did. The background was in shade, but the flower was in sunlight.
When I viewed the scene with my eyes, I could easily see the detail in the
background, but I knew, that the camera wouldn't be able to capture that detial. It's a very simple technique with very striking results.

Here, I used a light background with a dark object - it's more of a
silhouette.
Either way, the subject stands out!
Keep it simple...
Keep it simple! By avoiding distracting surroundings,
you can further isolate your subject. In these pictures, the
simplicity speaks for itself.
|